Repotting an orchid is a crucial part of its care routine, ensuring that it continues to grow healthily, absorb nutrients efficiently, and avoid root rot. Many beginner orchid growers hesitate to repot their plants out of fear of damaging the roots, but with the right techniques, the process can be simple and beneficial. This guide will take you through the step-by-step process of repotting an orchid, from identifying when to repot to selecting the best potting mix and ensuring proper aftercare.
When Should You Repot an Orchid?
Unlike many houseplants that require repotting based on size, orchids should be repotted when their growing medium begins to break down or their roots become overcrowded. Signs that your orchid needs repotting include:
- The potting medium is decomposing: Orchid bark and sphagnum moss degrade over time, leading to poor drainage and increased risk of root rot. If the medium looks soggy or compacted, it’s time to repot.
- Roots are overgrown or spilling out of the pot: If the orchid’s roots are pushing against the sides of the pot or growing out of the drainage holes, it needs more space.
- The orchid has outgrown its pot: If the plant looks too large for its container and starts to tip over, a slightly larger pot is needed.
- Yellowing or mushy roots: This can indicate overwatering, poor aeration, or root rot, all of which can be corrected by repotting.
- You just bought a new orchid: Many orchids sold in stores are in poor-quality potting media that may retain too much moisture, so repotting soon after purchase can improve their health.
The best time to repot an orchid is right after it finishes blooming, during its active growth phase. Avoid repotting while it has flowers, as this can cause stress and lead to flower loss.
Materials You’ll Need
Before starting, gather the following materials:
- A new pot: Choose a container that is only slightly larger than the current one (1-2 inches wider). Clear plastic pots with drainage holes are ideal, as they allow you to monitor root health.
- Fresh potting mix: Use an orchid-specific mix, such as bark, sphagnum moss, or a combination. Avoid standard soil, which retains too much moisture.
- Sterile scissors or pruning shears: These will be used to trim dead or rotting roots.
- Rubbing alcohol or hydrogen peroxide: To sterilize tools and prevent infections.
- A small stake or support (optional): Useful for stabilizing the orchid if needed.
- A bowl of lukewarm water: For soaking the roots and rehydrating dry orchids before repotting.
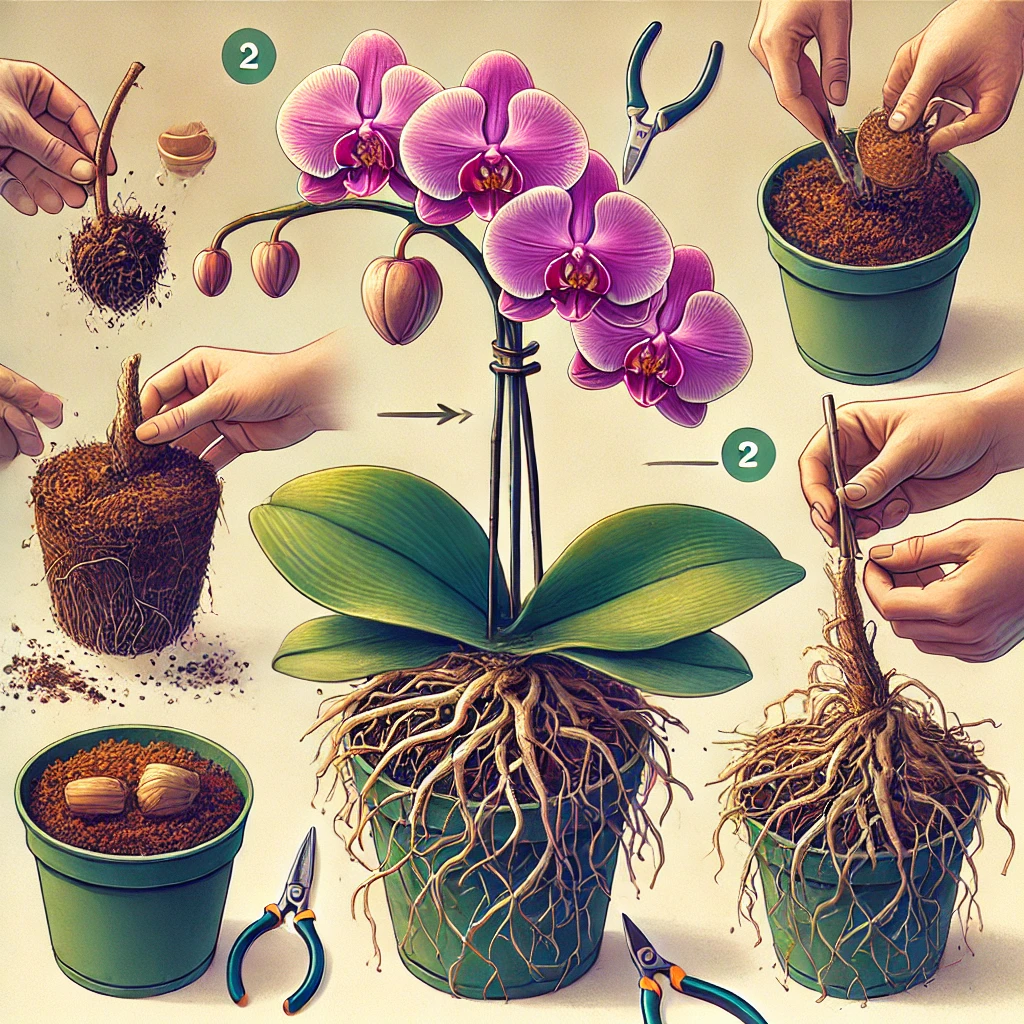
Step-by-Step Repotting Process
Step 1: Prepare the Orchid
Before removing your orchid from its current pot, soak it in lukewarm water for about 10–15 minutes. This softens the roots, making them more flexible and easier to handle without breakage.
Step 2: Remove the Orchid from Its Pot
Gently squeeze the sides of the pot (if using a plastic container) to loosen the roots. Carefully slide the orchid out, supporting the base to avoid damaging the plant. If the roots are firmly attached to the pot, you can run a sterile knife along the edges to help release them.
Step 3: Inspect and Trim the Roots
Shake off the old potting mix and examine the roots carefully. Healthy roots are firm, plump, and green or white, while unhealthy roots are brown, mushy, or shriveled.
- Trim away any dead or rotten roots using sterile scissors.
- If any roots appear dry or damaged, cut them back to healthy tissue.
- If you notice fungal spots or bacterial infections, lightly dust the affected area with cinnamon (a natural antifungal) or treat with hydrogen peroxide.
Step 4: Prepare the New Pot and Potting Mix
If using bark mix, soak it in water for about 30 minutes before potting. This prevents it from drying out too quickly after repotting.
Ensure your new pot has drainage holes, as orchids cannot tolerate standing water. If repotting into a decorative container, place a plastic orchid pot inside to maintain airflow and drainage.
Step 5: Replant the Orchid
- Hold the orchid in place in the new pot, positioning it so that the base of the leaves sits just above the potting medium.
- Gently fill in the new mix around the roots, ensuring they have room to spread but are also supported.
- Tap the pot lightly to help the medium settle without compacting it too much.
- If needed, add a stake to support the orchid until its roots anchor properly.
Step 6: Watering and Aftercare
After repotting, wait at least 24 hours before watering. This allows any root wounds to heal, reducing the risk of infection. When you do water, use room-temperature water and ensure excess moisture drains out completely.
Keep the orchid in indirect light and high humidity for the first few weeks to help it adjust. If you notice any signs of stress, such as limp leaves or slow root growth, misting the plant lightly can help increase moisture without overwatering.
Common Mistakes to Avoid
- Repotting in an oversized pot: Orchids prefer snug containers; a pot that is too large retains excess moisture, leading to root rot.
- Using soil or non-orchid potting mix: Orchids need airflow around their roots, so standard soil is too compact and suffocating.
- Packing the potting mix too tightly: This reduces aeration and can lead to root suffocation.
- Overwatering immediately after repotting: Waiting a day before watering helps prevent infections and shock.
How Often Should You Repot?
Most orchids should be repotted every 1 to 2 years, depending on the type of potting mix used. Bark decomposes over time, becoming less effective at drainage, while sphagnum moss compacts, reducing airflow. Regular repotting ensures your orchid continues to grow healthily.
Conclusion
Repotting an orchid may seem intimidating, but with the right approach, it becomes a simple and beneficial process. By choosing the correct pot, medium, and care routine, you can ensure your orchid continues to thrive, grow new roots, and bloom beautifully year after year. Taking the time to repot properly prevents disease, enhances growth, and promotes long-term orchid health, making it an essential skill for any orchid enthusiast.