Orchid roots are the foundation of a healthy plant, responsible for absorbing water, nutrients, and anchoring the plant in its growing medium. Unlike most houseplants, orchids have aerial roots that require air circulation and a well-draining potting mix. Many orchid problems, such as root rot, dehydration, or lack of blooming, stem from improper root care. Understanding how to properly care for orchid roots will ensure your plant thrives and produces beautiful flowers.
🌿 How to Identify Healthy and Unhealthy Orchid Roots
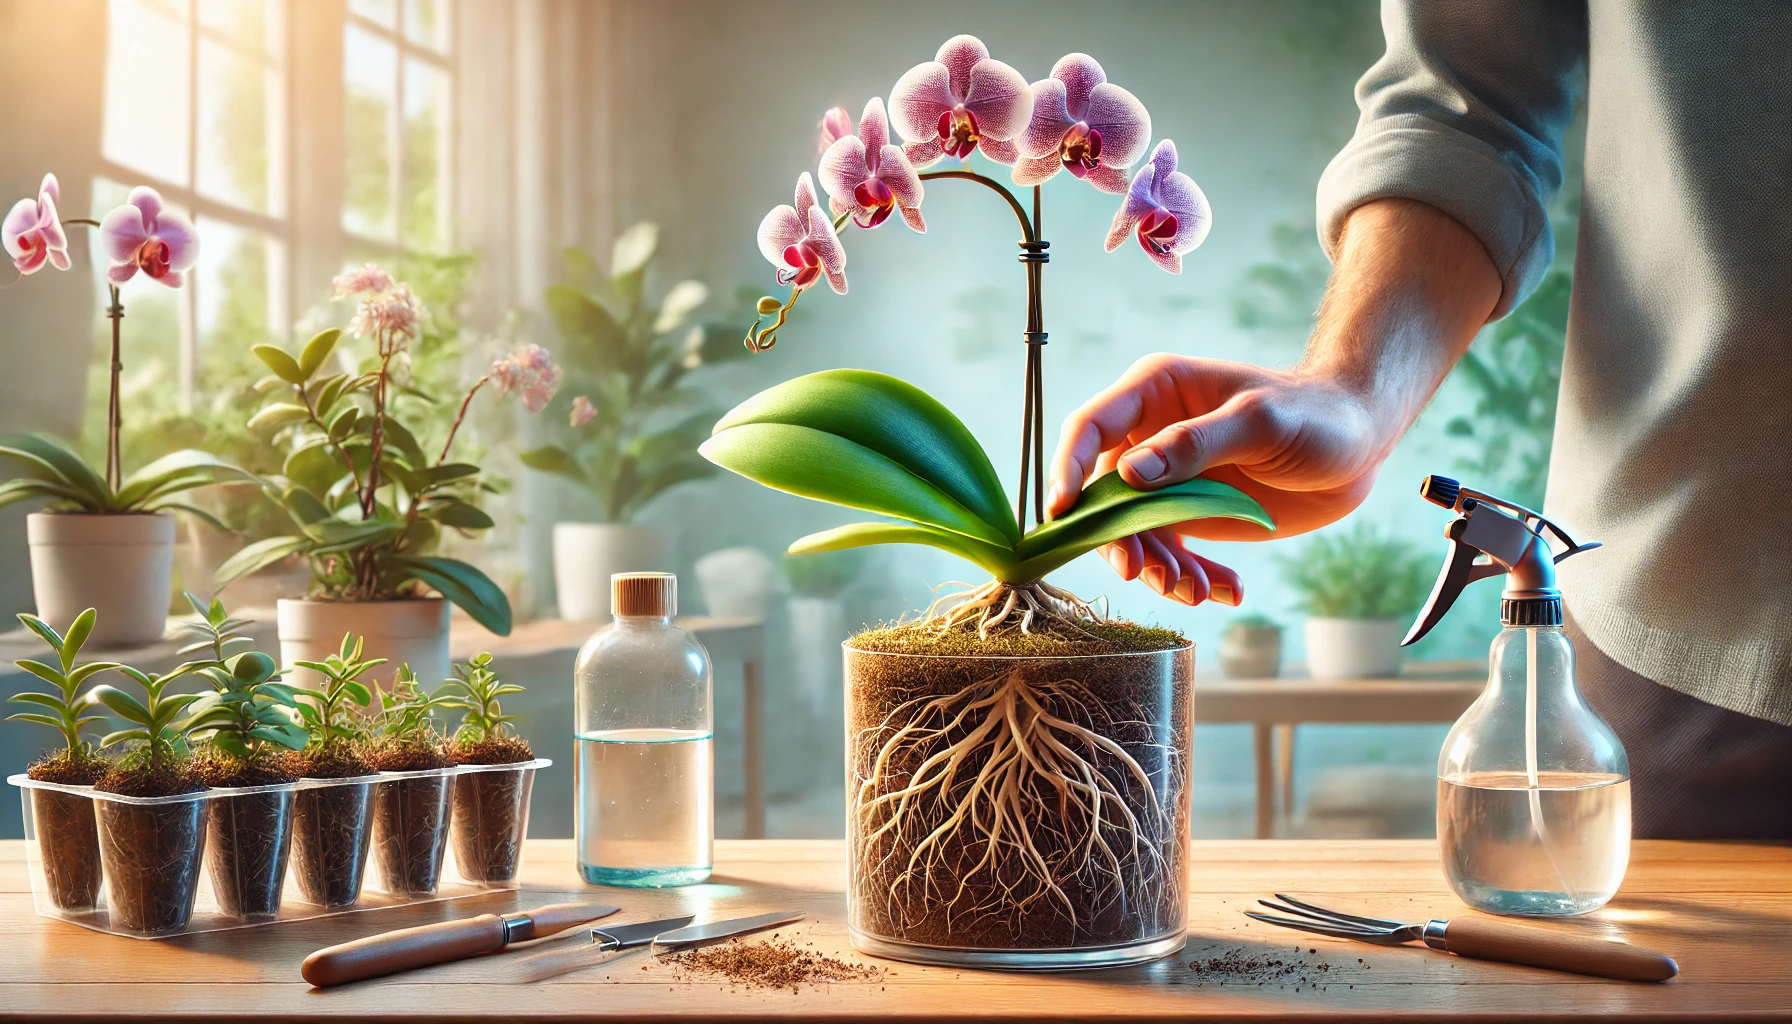
Healthy orchid roots should be firm, plump, and either green or silvery-white, depending on moisture levels. Green roots indicate the plant has recently been watered, while silvery-white roots mean it is time to water again. Unhealthy roots, however, will show signs of distress, which can be caused by overwatering, underwatering, or disease.
❌ Signs of Unhealthy Roots:
- Mushy, black, or brown roots (overwatering and rot)
- Shriveled, dry, or brittle roots (underwatering and dehydration)
- Roots with white cotton-like growth (fungal infection)
- A foul odor coming from the pot (advanced root rot)
🛠 How to Fix Unhealthy Roots:
✔ If roots are mushy or rotten, trim them with sterilized scissors and repot the orchid in fresh bark mix.
✔ If roots are dehydrated, soak the plant in lukewarm water for 10–15 minutes before resuming normal watering.
✔ For fungal infections, remove affected roots and apply a natural antifungal, like cinnamon powder.
💧 How to Water Orchids for Healthy Roots
Orchids require a balanced watering routine to prevent root problems. Overwatering leads to rot, while underwatering causes dehydration. The key is to water the plant only when the roots turn silvery-white and allow the excess moisture to drain completely.
✔ Best watering method: Place the pot in a bowl of room-temperature water and let the roots soak for a few minutes. Remove the orchid and allow it to drain fully.
✔ Water in the morning to ensure any excess moisture evaporates during the day, preventing bacterial and fungal growth.
✔ Never let the orchid sit in standing water, as this increases the risk of root rot.
✔ Reduce watering in winter, when orchids enter a dormant phase and require less moisture.
🏺 Choosing the Best Pot and Potting Mix for Strong Roots
Unlike regular houseplants, orchids cannot grow in normal soil because their roots need air circulation. Choosing the right pot and growing medium is essential for maintaining strong, healthy roots.
✔ Best pot types for orchids:
- Plastic pots retain moisture longer and are lightweight.
- Clay or terracotta pots allow better airflow but dry out faster.
- Transparent pots help monitor root health and moisture levels.
✔ Best orchid potting mediums:
- Bark chips provide excellent drainage and airflow, preventing rot.
- Sphagnum moss retains moisture well, making it suitable for orchids that need higher humidity.
- Coconut husk holds water slightly longer than bark but still allows good aeration.
- Perlite and charcoal improve drainage and prevent the potting mix from breaking down too quickly.
🌱 When and How to Repot an Orchid for Healthy Roots
Orchids should be repotted every 1–2 years, or whenever the potting mix begins to break down. If roots are growing outside the pot or the plant becomes unstable, it’s time for repotting.
❌ Signs Your Orchid Needs Repotting:
- Roots are growing out of the pot.
- The potting mix has decomposed and retains too much water.
- Water runs straight through the pot without being absorbed.
- The plant has become top-heavy and unstable.
🛠 How to Repot an Orchid:
✔ Step 1: Gently remove the orchid from its current pot, shaking off old potting mix.
✔ Step 2: Inspect the roots and trim any dead or rotting sections with sterilized scissors.
✔ Step 3: Choose a slightly larger pot with good drainage holes.
✔ Step 4: Add a layer of fresh orchid bark at the bottom, place the orchid in the center, and fill the rest of the pot with more potting mix.
✔ Step 5: Water lightly and place the orchid in a shaded area for a few days to reduce transplant shock.
🌬 The Importance of Air Circulation for Orchid Roots
Good airflow around the roots is crucial for preventing fungal infections and promoting strong growth. Orchids that are kept in humid environments without proper ventilation are more likely to develop root rot and mold.
✔ Ensure proper airflow by:
- Using pots with large drainage holes to allow excess water to escape.
- Keeping orchids in a well-ventilated room with indirect sunlight.
- Placing a small fan nearby to prevent moisture buildup around the roots.
- Avoiding overcrowding multiple orchids together, which can trap humidity.
🌡 Humidity and Temperature Considerations for Root Health
Orchids thrive in humidity levels between 50–70%. If the air is too dry, roots may become dehydrated, while excessive humidity can encourage fungal infections. Using a humidity tray (a shallow tray filled with pebbles and water) can help maintain proper moisture levels without overwatering the roots.
✔ Maintaining proper humidity:
- Place the orchid on a humidity tray to keep moisture levels stable.
- Mist the roots lightly only in dry conditions, but avoid excessive misting.
- Use a room humidifier if the air is too dry, especially in winter.
🛡 Final Tips for Keeping Orchid Roots Healthy and Strong
✔ Water only when roots turn silvery-white, avoiding excess moisture.
✔ Use a well-draining potting mix like bark or moss to prevent root suffocation.
✔ Repot every 1–2 years to refresh the growing medium.
✔ Maintain proper humidity and airflow to reduce fungal infections.
✔ Monitor root health regularly and trim any rotting or dead roots.
With proper root care, your orchid will grow stronger, absorb nutrients effectively, and reward you with vibrant flowers year after year. 🌸✨